Sunday, February 28, 2010

Little Orange Pound Cakes with Orange Glaze


I've moved house!

Which means: new kitchen, new hood, new views, new neighbours, new ceilings, new floors, new this, new that, bleep.

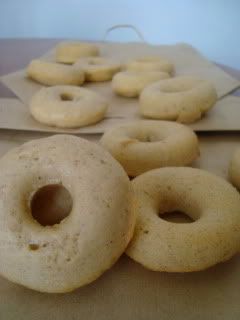
The first thing I baked in the shiny new abode was these cakes. My mom sent me a silicon mould with heart-shaped compartments for Valentine's Day, and I was all in a tizzy and had to use it right away. I don't have a pound cake recipe of my own, so I took a chance on the first one I came across.

I had one orange left from BAJA ORANGE SHRIMP FAJITAS, so I thought it best to have a pound cake of the orange-flavoured variety. BAAAA-JAAAAAAA!


The recipe is from My Wooden Spoon. I halved it because there are only six hearts in my mould, and I certainly didn't feel like two rounds of baking and I certainly didn't want muffin-shaped orange pound cakes (BORING)-- I'd just end up feeling bad for them because they'd have to sit around being boring while the cute heart ones were gobbled up in a hot second.

Here is the original recipe (un-halved):

Orange Pound Cake
1/2 cup butter, room temperature (I used margarine)
1 1/2 cups sugar
2 large eggs
1 1/2 cups flour
1 teaspoon baking powder
1/4 teaspoon salt
1/4 cup freshly squeezed orange juice
1/4 cup milk (I used soy)
1/2 teaspoon grated orange rind


Orange Glaze
2 tablespoons orange juice
1/3 cup confectioner's (powdered) sugar

1. Preheat oven to 325F (180 C) and butter a 9x5 inch loaf pan
2. Cream butter & sugar, then add eggs and mix well; set aside.
3. In another bowl, mix flour, baking powder and salt.
4. In a measuring cup combine orange juice, milk and orange zest
5. Start adding the juice mixture to the butter mixture, alternating with the flour mixture until light & creamy
6. Spoon (pour) into pan and bake for 45 minutes or until center comes out clean with toothpick
7. Cool in pan and then remove from pan and drizzle with glaze

They were quite tasty. In my opinion, pound cake SUCKS when hot, so don't sneak a bite before it's cooled. I ate one of the little hearts when it was still hot and I thought my first baking venture in my new home was a failure and I was slightly disappointed. Then they cooled and I glazed them and they were delish and hope was restored.

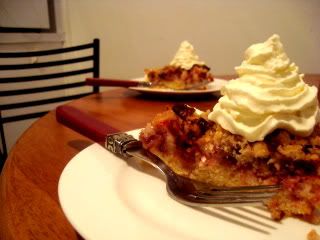
Oh, and I've made these since. It's the Strawberry Cake I've shown you before-- just muffin-sized!


Wednesday, February 3, 2010

Peanut Butter Cookies (Blossoms)


I've been thinking about peanut butter a lot lately. Thinking about putting it in my mouth. A few nights ago, my friends and I had a girl's night and I felt I ought to bring something sweet for after the veggie burritos. I decided on peanut butter squares, I made them, and they sucked. To be fair to the squares, they tasted quite nice, but the consistency and appearance were downright disappointing. So, I will not give you the recipe, nor will I write another lick about it. I'll provide you with a photo, though:


The failure left me feeling unfulfilled. So, onto another peanut butter treat! A tried and true and tremendous recipe for peanut butter cookies. It's my Mom's, and the original recipe is actually for Peanut Butter Blossoms. However, most unfortunately, Hershey's Kisses aren't available Down Under (except at USA Foods, where the going rate for a little bag containing five Kisses is $5 or something), so when I make them they're just plain old peanut butter cookies.

They're never as amazing as Mom's, of course. Mom isn't as enamoured of baking as myself, but when the mood strikes and she whips up a batch of something, they're always perfect! She must have inherited that from my Grandpa, who actually makes the actual best chocolate chip cookies in the actual world.

But mine are still good.

Peanut Butter Cookies (Blossoms)
1 3/4 cup flour
1 teaspoon baking soda
1/2 teaspoon salt
1/2 cup shortening (my mom always uses shortening, I use butter/margarine)
1 egg
1 teaspoon vanilla
1/2 cup sugar (plus a little extra sugar for rolling)
1/2 cup brown sugar
1/2 cup peanut butter
2 tablespoons milk

1. Preheat oven to 350 F (175 C) (after the dough is chilled)
2. Mix flour, baking soda, and salt in a small bowl
3. In a large bowl, mix shortening/butter, egg, vanilla, sugar, brown sugar, peanut butter, and milk
4. Gradually add the dry ingredients to the wet, mixing all the while
5. Chill the dough for 2 hours or more


6. Roll into perfect little balls and roll the perfect little balls in sugar
7. Bake 8-10 minutes


8. If you are doing Blossoms, press a Hershey's Kiss into the center of each cookie right after they come out of the oven

I bet some readers cried when they got to instruction #5. I HATE it when I have to chill dough, because I want the cookies now now NOW NOW.


Friday, January 29, 2010

Peanut Butter Cups


G came home from work and I said, 'Go to the kitchen and get something sweet!'
He said, 'Did ya bake?!'
The answer was no.

So, technically, this post doesn't belong on this blog. But peanut butter cups are one of my favourite things and I want to showwwww you the ones I maaaaaade, okay?

I made eight little ones in silicon cups, and one big one in a mini tart pan. Oh, and I also made three peanut butter balls.

Peanut Butter Cups
Chocolate-- it really depends how many you want to end up with! I used one bag of Cadbury chocolate chips.
3/4 cup smooooooth peanut butter
3/4 cup icing sugar
2 tablespoons melted butter

1. Boil water in a saucepan, then remove from heat and place bowl of chocolate chips on top
2. Stir until the chocolate melts, then add 1 tablespoon butter
3. Spoon into moulds (app. 1/4 full) and use a small spoon or spoon handle to smear the chocolate up on the sides


4. Place in fridge to set
5. Thoroughly mix the peanut butter, icing sugar, and 1 tablespoon melted butter (taste it, and go ahead and make it more peanut buttery or more sugary according to your liking)
6. When chocolate has set, roll the peanut butter into small balls, place them in each mould, and smoosh them down a bit


7. If the chocolate in the bowl has hardened, repeat the melting process, then spoon it over the peanut butter just to the brim of the mould
8. Return them to the fridge to set!

When they hard, eatum.

Thursday, January 28, 2010

Strawberry Cake to Have with Tea


The other day, two of my favourite people brought over a punnet of strawberries! Oliver and Georgia had gone strawberry pickin' in the country and their bounty was too great to keep to themselves.


I ate a fair few strawberries over the next couple days, but my efforts weren't making much of a dent. So, I confronted the large punnet head-on, and baked a darn cake.

I wish I could describe to you how much I enjoy this cake. Maybe I enjoyed it so immensely because I was just a leetle drunk when I had a piece last night. But, then again, my husband wasn't drunk and he really dug it. Also, I had another piece this morning and it was just as good-- with a lil bit of whipped cream, oh HELL YEAH.


Strawberry Cake
1 cup flour
1/2 cup sugar
2 teaspoons baking powder
1/2 teaspoon salt
1/2 cup milk
1 egg
2 tablespoons melted butter
2 cups sliced strawberries


Crumb Topping
1/2 cup flour
1/2 cup sugar
1/4 cup melted butter
1/3 cup chopped nuts (I used pecans)

1. Preheat oven to 375 F (190 C)
2. Mix flour, sugar, baking powder, and salt in mixing bowl
3. Add milk, egg, and butter
4. Spoon into 8-inch pan (in the past, I've used the plain, 8-inch cake pan, but this time I used a slighter larger but shallower tart pan)
5. Top with strawberries
6. Combine crumb ingredients
7. Sprinkle over batter in pan
8. Bake 30-35 minutes

What would you guys do if I just got stuck like a broken record and I was like:
5. Top with strawberries

You'd be like, 'ONTO THE NEXT DIRECTION, JO BEAN!'

The only direction you need: Go make a cake, fool.

Monday, January 25, 2010

Cupcakes with Lemon Buttercream Frosting (for Australia Day!)


Yesterday was Australia Day! Before the drinking and barbecuing began, I churned out some special Aussie cupcakes. I ate a fair few in order to pad my stomach for the afternoon's heavy alcohol consumption-- so I can happily report that the verdict is... nummy!

The cupcakes are my usual vanilla cupcake recipe, which is here. And guess what flavor the frosting is! GUESS GUESS GUESS! It's LEMON! Ohmigoodness.

Everything went fairly smoothly. I put too much lemon juice in the frosting, so I had to add more butter and sugar-- but stick to what the recipe calls for and you'll be fine. If you want them extra-lemony, add extra zest, not juice.

At one point, I felt like a fraud when I called a mini cupcake a 'little shit' (it kept falling over, but in retrospect, that was probably my fault for making it so top-heavy with all that frosting). But immediately felt remorseful and said, 'No you're not a little shit, you're lemony and perfect.'

Lemon Buttercream Frosting
(from Cupcakes by Martha Swift and Lisa Thomas)
1/2 cup butter, soft
2 tablespoons lemon juice
Zest from 2 lemons
2 cups icing sugar

1. Beat butter, lemon juice, lemon zest, and half the icing sugar
2. Gradually add remaining icing sugar, and beat well

I think maybe double the recipe. Or halve my cupcake recipe. Cause I know you don't want to have to be stingy with the frosting.


Aussie flag, coat of arms, and silhouette.


HAPPY AUSTRALIA DAY!

Wednesday, January 20, 2010

Baked Doughnuts


I have searched high and low for a doughnut pan for years. I would be able to find one faster than you could say 'fractured prune' if I was in the USA. But I live in Australia-land now, and although dreams do come true here as well, the selection of most things is somewhat less extensive. I wandered into The Essential Ingredient the other day with the intention of buying a cookie dough scoop, and stumbled upon a lone doughnut pan amongst bundt pans, shell-shaped tins, and all kinds of the usual baking paraphernalia. Oh boy, was I excited!

My pal Jessie and I organised a baking day soon thereafter, and the rest is chocolate icing, sugar+cinnamon, and sprinkles.

As it was my first time, I wrote down four or five different recipes and went with the most promising. The only change I made was to omit the nutmeg and double the cinnamon-- I find nutmeg to be overpowering and didn't want it to dominate the doughnut.

Baked Doughnuts (makes 12)
1 cup flour
1/2 cup sugar
1 1/2 teaspoons baking powder
1/4 teaspoon salt
1 teaspoon cinnamon
1/2 cup milk (I used soy)
1/2 teaspoon apple cider vinegar
1 egg
1/4 cup butter (I used Nuttalex)

1. Preheat oven to 350 F (180 C)
2. In a mixing bowl, combine flour, sugar, baking powder, salt, cinnamon
3. In a saucepan, combine milk, vinegar, egg, and butter over medium-low heat until the butter is melted and it's well-combined
4. Add the wet ingredients to the dry ingredients and stir until just combined
5. Scoop into greased doughnut pan, filling each thingy 2/3
6. Bake for 12 minutes

Allow them to cool for a couple minutes in the pan, then tip them out. It's the best part-- they look so cute when they bounce out and roll around the table. I know doughnuts are best warm, but if you ice them when they're warm, the icing thins and melts all over the place. But if you're doing a glaze, cinnamon sugar, or powdered sugar doughnuts it's fine to dress them and devour them right away.


Chocolate Glaze
1/2 cup chocolate morsels
1/2 cup powdered sugar
1 teaspoon vanilla
2 tablespoons melted butter
2 tablespoons boiling water

1. Melt the chocolate in a double boiler
2. Remove from heat and add the sugar, vanilla, and melted butter
3. Add boiling water

Dip the doughnuts into the glaze to the halfway point and sprinkle some sprinkles before the icing hardens!

For cinnamon and sugar doughnuts, brush them with melted butter and roll in a bowl of sugar mixed with cinnamon to coat.


You can use white sugar or powdered sugar-- both were delish, but I found myself particularly enjoying the powdered sugar doughnuts.


Mini Birthday Cake


Last weekend we celebrated my friend Hannah's birthday! I've never been in the country for her birthday, so I felt I ought to make something real special for her ('I've never been in the country for her birthday'-- that makes me sound so cool).

I decorated it in such a hurry, my kitchen was left looking like the aftermath of a party hurricane.

The cake is a vegan recipe I got from one of my favourite blogs, Bread and Honey. However, Hannah's tumtum doesn't agree with wheat, so I substituted brown rice flour for this particular cake. I've used this recipe many times, and both flours work a charm. I also double it, because the original recipe is for a mini vegan cake, and I usually want a full size 8-incher. So, this is the recipe, doubled.

Vegan Chocolate Cake
1 1/2 cups flour
2/3 cup cocoa powder
1/2 teaspoon baking soda
1/4 teaspoon salt
1 cup sugar
1/2 cup canola oil
1 cup cold water
2 teaspoons vanilla
2 tablespoons apple cider vinegar

1. Preheat oven to 375 F (190 C)
2. Mix all ingredients together in a large mixing bowl
3. Grease an 8 inch cake pan
4. Pour da batta in
5. Bake 25-30 minutes
6. If you want to make a three-tiered cake like Hannah's birthday cake, after the cake has cooled COMPLETELY, cut three circles out of it, each slightly smaller than the last. My base circle was probably about 3 1/2 inches across, 4 tops.

The frosting I made is very yummy, but cream cheese/whipped cream frostings are a pain because they're just not especially firm and they don't like to be out of the fridge for long. I made a very small batch because the cake is teensy. Also, note that the frosting isn't vegan.

Whipped Cream Cheese Frosting
1/2 a package cream cheese
1/4 cup white sugar
1 teaspoon vanilla
1 cup heavy whipping cream

1. Beat cream cheese, sugar, and vanilla in a mixing bowl
2. Add cream and continue to beat beat beat until it forms firm peaks

So, stack the three cake circles, using the frosting as an adhesive between each one. I stuck a wood skewer (which I later put a little H-flag on) right through the whole cake to prevent slippage. Now, frost the whole darn thing and decorate with sugar and spice and everything nice-- that's what birthday girls are made of!